Pulse Width Modulation (PWM) is a technique used to control the power delivered to an electronic device, such as a motor or LED, by varying the width of the pulse signal. In the case of the STM32 microcontroller, it offers built-in hardware and timer-based PWM features that make it ideal for various applications that require precise control of PWM signals.
What is PWM?
PWM stands for Pulse Width Modulation, which is a modulation technique used in electronics to control the average voltage or power delivered to a load. It involves rapidly switching a digital signal between on and off states at a certain frequency, with the width of the on state (duty cycle) determining the average power delivered.
Definition and Purpose of PWM
The purpose of PWM is to control the power delivered to a load, such as a motor or LED, by varying the width of the pulse signal. By adjusting the duty cycle of the signal, the average power delivered can be precisely controlled, allowing for smooth and accurate control of devices.
STM32 PWM Features
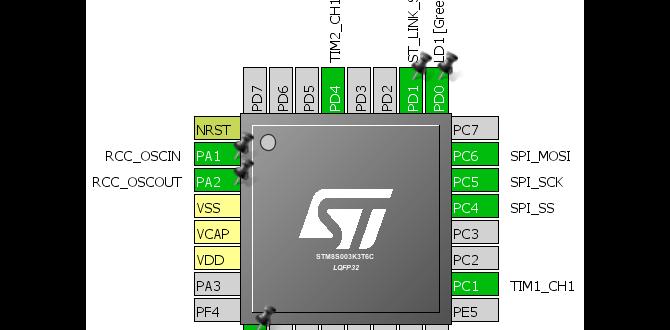
The STM32 microcontroller offers a range of PWM features that make it suitable for various applications:
Hardware-based PWM
STM32 microcontrollers have dedicated hardware modules that can generate PWM signals with high precision and accuracy. These hardware modules offload the CPU, allowing for efficient and reliable generation of PWM signals.
Timer-based PWM
The STM32 microcontrollers have built-in timers that can be configured to generate PWM signals. These timers offer flexibility in terms of frequency and duty cycle settings.
Output Channels and Resolution
The number of output channels and the resolution of PWM signals vary depending on the specific STM32 microcontroller. Some microcontrollers offer multiple output channels with high-resolution PWM signals, allowing for precise control of multiple devices simultaneously.
Configuring STM32 PWM
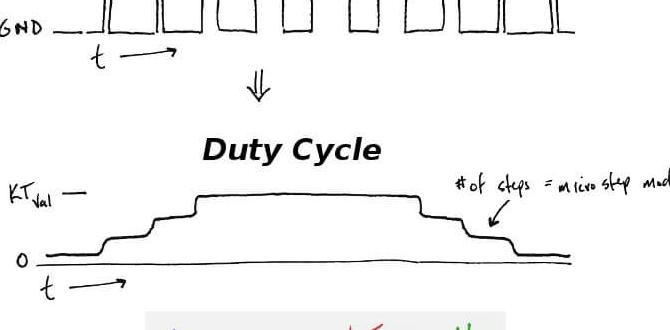
To configure the STM32 microcontroller for PWM output, several steps must be followed:
GPIO Configuration
First, the GPIO pins that will be used for PWM output need to be configured. This involves setting the pins as alternate function outputs and selecting the appropriate alternate function mode for PWM.
Timer Configuration
Next, the timer module of the STM32 microcontroller needs to be configured for PWM generation. This includes setting the timer prescaler, period, and configuring the pulse width (duty cycle) registers.
Duty Cycle and Frequency Settings
The duty cycle and frequency of the PWM signal are determined by the values programmed into the timer registers. By adjusting these values, the duty cycle and frequency can be set according to the requirements of the application.
Using STM32 PWM for Motor Control
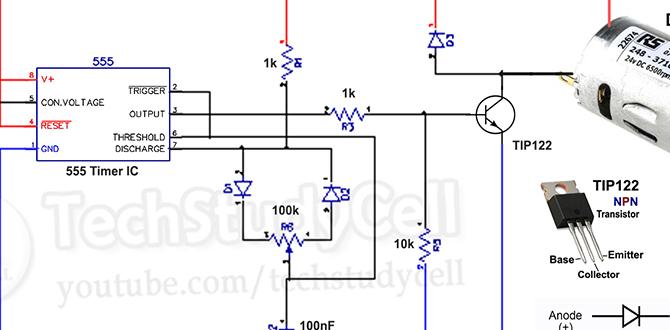
Motor Control Basics
One of the common applications of using PWM is motor control. By adjusting the duty cycle of the PWM signal, the average power delivered to the motor can be controlled, allowing for speed and direction control of the motor.
Configuring PWM for Motor Control
To use STM32 PWM for motor control, the PWM signal needs to be connected to the motor driver circuit. The duty cycle of the PWM signal can then be adjusted to control the speed and direction of the motor. Additional control techniques, such as PID control, can be implemented for more precise motor control.
Advanced Features of STM32 PWM
Dead Time Insertion
Dead time refers to a short period during which both the high and low side switches of a power device are off to prevent shoot-through current. STM32 microcontrollers offer dead time insertion features that help prevent shoot-through issues in motor control and power conversion applications.
Center-aligned Mode
Center-aligned PWM mode is a technique used to generate a symmetrically centered pulse waveform. This mode can be beneficial in applications that require precise control of the duty cycle, especially in motor control and power conversion applications.
PWM Capture Mode
PWM capture mode allows the STM32 microcontroller to capture the pulse width and frequency of an external PWM signal. This feature is useful in applications where the STM32 needs to synchronize its operations with an external PWM source.
Troubleshooting STM32 PWM
Common Issues and Solutions
- Issue: PWM signal not outputting.
- Solution: Check GPIO and timer configurations, ensure correct pin assignment and proper initialization of the timer module.
- Issue: Incorrect duty cycle or frequency.
- Solution: Verify the values programmed into the timer registers and adjust them accordingly.
- Issue: PWM signal not reaching the desired output range.
- Solution: Check the power supply voltage and ensure it is within the range specified for the STM32 microcontroller.
Conclusion
The STM32 microcontroller offers a range of features for generating precise and accurate PWM signals. Whether it is for motor control, power conversion, or other applications that require PWM control, the STM32 provides the necessary tools and flexibility to meet the requirements. By understanding the hardware and software configurations, users can harness the power of STM32 PWM for their specific applications.
FAQs
Q: Can I control multiple devices with STM32 PWM?
A: Yes, depending on the specific STM32 microcontroller, it can offer multiple output channels for simultaneous control of multiple devices.
Q: Is it possible to change the duty cycle and frequency of the PWM signal dynamically?
A: Yes, the duty cycle and frequency of the PWM signal can be adjusted dynamically by changing the values programmed into the timer registers.
Q: What is the advantage of using hardware-based PWM?
A: Hardware-based PWM offloads the CPU, allowing for efficient and reliable generation of PWM signals without CPU intervention.
Q: Can STM32 microcontrollers capture external PWM signals?
A: Yes, some STM32 microcontrollers have PWM capture mode, which allows them to capture the pulse width and frequency of an external PWM source.
Q: How can I troubleshoot PWM signal issues on STM32 microcontrollers?
A: Common troubleshooting steps include verifying the GPIO and timer configurations, checking pin assignments, and ensuring proper initialization of the timer module.