Recording in 4K resolution has become increasingly popular due to its high level of detail and clarity. However, not everyone has a 4K monitor. If you have a 1080p monitor but still want to record in 4K, there are solutions available to help you achieve this. In this article, I will guide you through the process of recording in 4K using a 1080p monitor, from understanding the limitations to adjusting display settings and connecting external devices.
Understanding the Limitations of a 1080p Monitor

A 1080p monitor has a resolution of 1920×1080 pixels, which means it can display up to 2.1 million pixels. On the other hand, a 4K monitor has a resolution of 3840×2160 pixels, providing four times the number of pixels as a 1080p monitor. This difference in resolution can affect the level of detail and overall video quality.
Resolution Differences Between 4K and 1080p
The main difference between 4K and 1080p resolutions is the number of pixels they can display. A 4K resolution has approximately 8.3 million pixels, while a 1080p resolution has 2.1 million pixels. This means that a 4K image will have more details and sharper quality compared to a 1080p image.
Impact on Video Quality
Recording in 4K resolution provides a higher level of detail and clarity, resulting in sharper and more visually appealing videos. However, when recording in 4K on a 1080p monitor, you won’t be able to fully experience the true resolution of the video. The resulting video will still have a higher level of detail compared to a 1080p recording, but it won’t be as crisp as viewing it on a 4K monitor.
Using Software to Record in 4K

While a 1080p monitor may not be capable of displaying 4K resolution, you can still record in 4K by using specialized software. There are several options available that allow you to capture and record in 4K, regardless of your monitor’s resolution.
Researching Software Options
Before recording in 4K, you need to research and identify the software that is compatible with your setup. Look for software that offers 4K recording capabilities and supports your operating system. Some popular options include OBS Studio, Bandicam, and Camtasia.
Selecting and Installing 4K Recording Software
Once you have identified the software that meets your requirements, download and install it on your computer. Follow the provided instructions for a successful installation and ensure that the software is compatible with your hardware and operating system.
Adjusting Settings for 4K Recording
After installing the software, launch it and navigate to the settings or preferences menu. Look for options related to video recording and resolution. Set the recording resolution to 4K (3840×2160) and adjust any other settings as per your preferences. Make sure to save the changes before proceeding.
Connecting External Devices for 4K Recording

In addition to using software, you may also need to connect external devices to capture and record in 4K. This is especially relevant if you want to record from a 4K camera or other devices that support 4K resolution.
Identifying Necessary Cables and Adapters
Check the requirements of your external device and identify the cables and adapters needed to connect it to your computer. Common options include HDMI cables, Mini DisplayPort to HDMI adapters, or USB-C to HDMI adapters, depending on your specific setup.
Connecting a 4K Camera or Device
Once you have the necessary cables and adapters, connect your 4K camera or device to your computer. Use the appropriate ports and ensure a secure connection. Some devices may require additional software or driver installations, so follow the manufacturer’s instructions if necessary.
Configuring Monitor and Device Settings
After connecting the external device, you may need to configure the display settings on both your monitor and the connected device. Check the user manual or online resources for your specific devices to ensure the optimal settings for recording in 4K.
Adjusting Display Settings for Optimal Recording

Although a 1080p monitor cannot display 4K resolution, you can still adjust its settings to optimize the recording process and achieve the best possible results.
Changing Resolution Settings on the Monitor
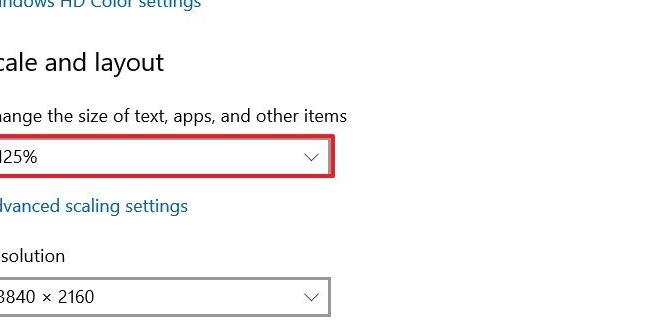
Access the display settings on your 1080p monitor and look for resolution options. While you cannot select 4K resolution, you may be able to adjust other settings such as display scaling or aspect ratio to enhance the viewing experience while recording in 4K.
Calibrating Color and Contrast for Accurate Playback
To ensure accurate color reproduction and contrast in your recordings, you can calibrate your monitor using a color calibration tool or by adjusting the settings manually. This will help to achieve more accurate and consistent visuals in your 4K recordings.
Optimizing Display Settings for Recording Clarity
Experiment with different display settings such as brightness, sharpness, and color saturation to find the optimal balance for your 4K recordings. Adjust these settings according to your personal preferences and the content you are recording.
Testing and Troubleshooting the Setup

Before finalizing your 4K recording setup, it is essential to run test recordings and troubleshoot any issues that may arise.
Running Test Recordings in 4K
Use your chosen recording software to perform test recordings in 4K resolution. This will allow you to check the quality of the video, identify any potential issues, and make necessary adjustments to your setup or settings.
Diagnosing Common Issues and Potential Solutions
If you encounter any issues during the test recordings, troubleshoot the problem by identifying the possible causes. Common issues may include audio sync problems, dropped frames, or distorted video quality. Research and apply appropriate solutions to address these problems.
Seeking Technical Support if Necessary
If you are unable to resolve the issues on your own, consider seeking technical support from the software manufacturer or the device manufacturer. They can provide expert guidance and assistance to help you achieve optimal 4K recording results.
Finalizing the Recording and Storage

Once you have successfully recorded your video in 4K resolution, there are a few final steps to take before you can share or store the footage.
Reviewing and Editing the Recorded Footage
Take the time to review the recorded footage and make any necessary edits or enhancements. Trim unwanted sections, add effects or annotations, and ensure the video is polished and ready for the intended purpose.
Converting and Compressing the Video for File Size Management
As 4K videos tend to have large file sizes, it may be necessary to convert and compress the video to a more manageable size. There are various software programs available that can assist with this process while maintaining video quality.
Choosing Appropriate Storage Options for 4K Recordings
Since 4K videos consume a significant amount of storage space, it is crucial to select appropriate storage options. Consider using external hard drives or cloud storage services that offer sufficient capacity and reliable backup options.
Tips and Best Practices for 4K Recording on a 1080p Monitor
While recording in 4K on a 1080p monitor poses some limitations, there are several tips and best practices you can follow to optimize your recordings:
Lighting and Background Considerations
Ensure proper lighting in your recording environment to enhance the clarity and detail of your videos. Avoid busy or distracting backgrounds that may detract from the overall quality.
Framing Shots Effectively in 4K
Since a 1080p monitor cannot display the full 4K resolution, it is important to frame your shots carefully to capture the most essential details within the frame. Use the zoom function to focus on specific areas of interest.
Recording Sound and Adjusting Audio Settings
Sound quality is crucial for impactful videos. Invest in a high-quality microphone and adjust the audio settings in your recording software to capture clear and balanced sound.
Conclusion
Recording in 4K resolution with a 1080p monitor is possible through the use of specialized software and by adjusting display settings. Although the full benefits of a 4K monitor cannot be experienced on a 1080p screen, you can still achieve higher video quality and level of detail. By following the steps outlined in this article, you can record in 4K and produce visually stunning videos, even without a 4K monitor.
FAQs
Q: Can I edit and render the recorded 4K footage on a 1080p monitor?
A: Yes, you can edit and render the recorded 4K footage on a 1080p monitor. The editing software will downscale the footage to fit the monitor’s resolution, but you can still work with and export the footage in 4K resolution.
Q: Will a 4K recording on a 1080p monitor look better than a native 1080p recording on the same monitor?
A: Yes, a 4K recording on a 1080p monitor will typically look better than a native 1080p recording on the same monitor. The 4K recording can capture more details and provide a higher level of visual clarity, even though the monitor cannot display the full 4K resolution.
Q: Can I watch the recorded 4K video on a 4K TV or monitor?
A: Yes, you can watch the recorded 4K video on a 4K TV or monitor. When played on a 4K display, the video will showcase the true 4K resolution, providing a higher level of detail and clarity.
Q: Is it possible to record in 4K using a 1080p monitor on a Mac?
A: Yes, it is possible to record in 4K using a 1080p monitor on a Mac. However, you may need to ensure that your Mac model and operating system support the necessary software and hardware requirements for 4K recording.
Q: Are there any affordable 4K monitors available for purchase?
A: Yes, there are several affordable 4K monitors available in the market. Prices may vary depending on the brand, size, and specific features of the monitor. Do some research and compare options to find a suitable 4K monitor within your budget.