Modbus RS485 is a popular communication protocol used in industrial automation and control systems. It allows devices to communicate over a serial network using a master-slave architecture. Arduino, a versatile microcontroller platform, can be used to implement Modbus RS485 communication. In this article, I will provide an overview of Modbus RS485 communication, explain the Modbus protocol for RS485, discuss the Modbus library for Arduino, and provide examples of how to set up and troubleshoot Modbus RS485 communication with an Arduino. Finally, I will explore some common applications of Modbus RS485 communication with Arduino.
Overview of Modbus RS485 Communication

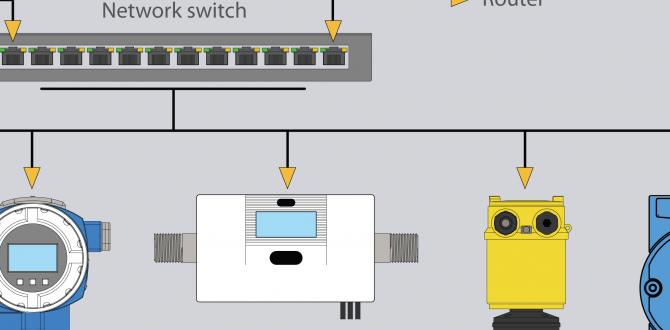
Modbus is a widely used protocol in the industrial automation field. It allows devices to exchange data between a master, typically a supervisory control and data acquisition (SCADA) system, and multiple slave devices. The RS485 physical layer is commonly used for Modbus communication due to its robustness and ability to support long distances.
Modbus Protocol for RS485
The Modbus protocol defines the structure of data packets for communication between devices. It uses a simple and efficient binary format, making it suitable for resource-constrained devices like Arduino. The protocol supports various data types and functions, including read and write operations.
Modbus Library for Arduino
There are several Modbus libraries available for Arduino that simplify the implementation of Modbus communication. These libraries handle the low-level details of the Modbus protocol, allowing users to focus on developing their application logic. Some popular libraries include ModbusMaster, ArduinoModbus, and SimpleModbus.
Setting up Modbus RS485 Communication with Arduino
Hardware Requirements
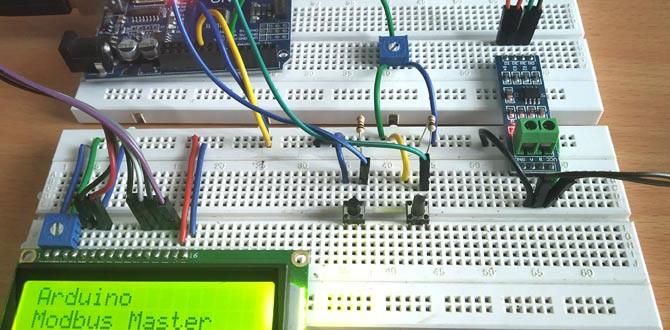
To set up Modbus RS485 communication with Arduino, you will need the following hardware:
- Arduino board (such as Arduino Uno or Arduino Mega)
- RS485 module or converter
- Power supply for the RS485 module
Software Setup
Here is a step-by-step guide to setting up Modbus RS485 communication with Arduino:
- Connect the RS485 module to the Arduino board, ensuring the proper pin connections.
- Install the Modbus library of your choice in the Arduino IDE.
- Write your Arduino code to configure the RS485 module and handle Modbus communication.
- Upload the code to the Arduino board.
- Connect the Arduino and the Modbus slave device(s) using the RS485 wiring.
- Power up the RS485 module and the slave device(s).
Modbus RS485 Communication Examples with Arduino

Reading Data from a Modbus Device
To read data from a Modbus slave device, you need to send a read request to the device using the Modbus protocol. The response will contain the requested data, which you can then process in your Arduino code. Here is an example code snippet using the ModbusMaster library:
#include <ModbusMaster.h>ModbusMaster node;void setup() { // Initialize the Modbus library node.begin(1, Serial); // Set the slave ID of the target device node.setSlaveId(1);}void loop() { // Read holding registers from the slave device, starting from address 0 uint8_t result = node.readHoldingRegisters(0, 2); // Check if the read request was successful if (result == node.ku8MBSuccess) { // Print the retrieved data Serial.print("Register 0: "); Serial.println(node.getResponseBuffer(0), HEX); Serial.print("Register 1: "); Serial.println(node.getResponseBuffer(1), HEX); } delay(1000);}Writing Data to a Modbus Device
To write data to a Modbus slave device, you need to send a write request with the desired values using the Modbus protocol. The response will indicate whether the write operation was successful. Here is an example code snippet using the ModbusMaster library:
#include <ModbusMaster.h>ModbusMaster node;void setup() { // Initialize the Modbus library node.begin(1, Serial); // Set the slave ID of the target device node.setSlaveId(1);}void loop() { // Write a value to a holding register of the slave device uint8_t result = node.writeSingleRegister(0, 123); // Check if the write request was successful if (result == node.ku8MBSuccess) { Serial.println("Write successful!"); } delay(1000);}Troubleshooting and Common Issues

Debugging Modbus RS485 Communication
If you encounter issues with Modbus RS485 communication, here are some steps you can take to debug the problem:
- Check the wiring connections between the Arduino, RS485 module, and slave device(s).
- Verify that the baud rate and other communication parameters are correctly configured in your Arduino code.
- Use a serial monitor to check the communication messages between the Arduino and the Modbus devices.
- Ensure that the Modbus slave devices are properly configured and respond to read/write requests.
Best Practices for Reliable Modbus RS485 Communication
To ensure reliable Modbus RS485 communication, consider the following best practices:
- Use shielded twisted pair cables for the RS485 bus to minimize interference and signal degradation.
- Ensure an adequate power supply for the RS485 module and the connected devices to prevent voltage drops.
- Implement error checking and data validation mechanisms to detect and handle communication errors.
- Avoid long cable runs or use repeaters to overcome distance limitations of the RS485 network.
Modbus RS485 Communication Applications with Arduino
Industrial Automation and Control Systems
Modbus RS485 communication with Arduino finds extensive use in industrial automation and control systems. Arduino can act as a gateway between different Modbus devices, enabling data acquisition, monitoring, and control of various processes and equipment. It allows for seamless integration of sensors, actuators, and other devices into a centralized control system.
Home Automation and Smart Systems
Arduino-based Modbus RS485 communication is also valuable for home automation and smart systems. It enables the integration of multiple subsystems such as lighting, HVAC, security, and energy management into a unified control platform. Arduino can receive data from various sensors and control devices based on user-defined rules and preferences.
Conclusion
In this article, we explored the setup and implementation of Modbus RS485 communication with Arduino. We discussed the Modbus protocol for RS485 and the available libraries for Arduino. We provided examples of reading and writing data to Modbus slave devices and shared troubleshooting tips and best practices for reliable communication. Finally, we highlighted the applications of Modbus RS485 communication with Arduino in industrial automation and home automation systems.
Frequently Asked Questions
1. Can I use Modbus RS485 communication with Arduino Uno?
Yes, you can use Modbus RS485 communication with Arduino Uno. The Arduino Uno has serial communication capabilities that can be used to connect and communicate with Modbus slave devices using the RS485 physical layer.
2. What is the difference between Modbus RTU and Modbus ASCII?
Modbus RTU and Modbus ASCII are two variants of the Modbus protocol. Modbus RTU uses a binary encoding scheme, while Modbus ASCII uses a hexadecimal character encoding. Modbus RTU is more commonly used due to its compact size, efficient serialization, and better error detection.
3. Can Arduino be used as a Modbus master?
Yes, Arduino can be used as a Modbus master. The master is responsible for initiating and controlling the communication with the Modbus slave devices. Arduino can send read and write requests to the slave devices and process the received data.
4. Is it possible to connect multiple Modbus slave devices to Arduino?
Yes, it is possible to connect multiple Modbus slave devices to Arduino. Arduino can communicate with multiple slave devices on the RS485 network by addressing each device with a unique slave ID. The Modbus library used should support multi-slave communication.
5. Can I implement Modbus TCP/IP communication with Arduino?
Yes, it is possible to implement Modbus TCP/IP communication with Arduino. To do this, you will need an Arduino Ethernet shield or an Arduino board with built-in Ethernet capabilities. The Ethernet connection can be used to establish a TCP/IP connection with Modbus TCP-compatible devices on the network.